Vertaal met Google

2012/03/31

Update on the Algae

So, ever since my last post on algae I have been trying to get rid om them. Here's a short update of the method I chose, that seems to be working so far. 

My first wish was to use as little 'medicine' as possible. I read some articles that reminded me of biology class in secondary school: photosynthesis...the magic word. It appears that, as many of you will remember, plants produce O2 (oxigen) in lighted conditions and use CO2 to both produce it and in order to grow. In dark condition the proces reverses and CO2 gets produced through O2 usage. Algae on the other hand appear to use O2 (produced by plants) in daytime conditions in order to grow.

So: Lots of light will result in an overproduction of O2, which gives algae plenty of opportunity to grow. I live in a house very well lit by daylight and the shrimptank can't get away from the daylight as well, although it is pushed back as far away as possible. I also had the Aquatic Nature Solar Boy Duo running 12 hours a day...

Here's what I did:
  • I pushed back the timer of the Solar Boy Duo to do only 4 hour sessions, twice a day. 
  • I darkened the tank throughout the daytime.
Every morning after breakfast, I put a magazine on the shortside (held there by the cleaning magnet) and pulled a trashbag over the front and upside. (Remember the backside is covered with black foil already). I turned the light off to avoid heating and potential fires. With the filter on the opposite shortside and the ligth coming from the oposite direction, darkening that side is hardly worth the effort. 

When I got home from work, I removed the foil and started switch the light back on. 

Results:
Every week I refresh abouth 30% of the water, and along with it I try to remove as much of the algae I can get my hands on. Usually those were back the week after, but that proces has stopped now!

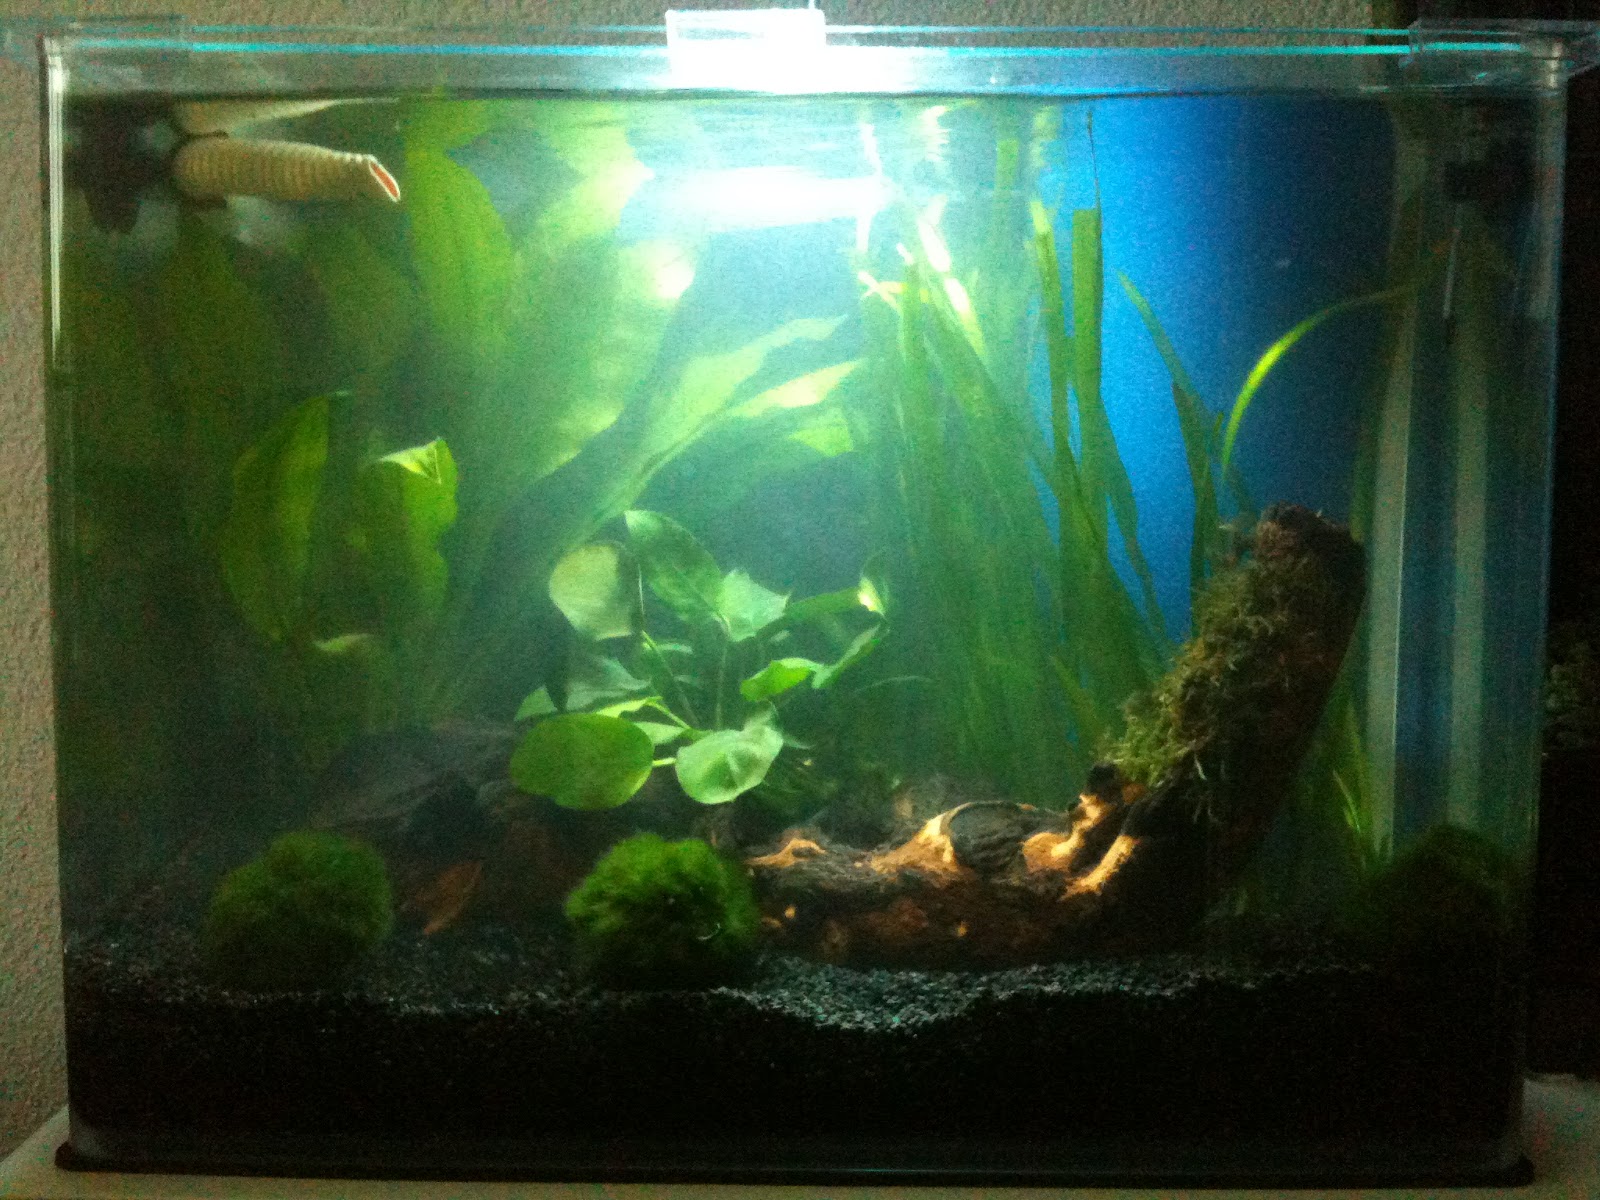
The anubias nana is almost completely algae-free after three weeks of treatment. The valisneria seems to be getting better, although growth has slowed down significantly!

Only the plant in the back, the Echinodorus, seems to have stopped growing and, although algae are leaving it alone, seems to slowly die on me. 

As a side-effect, the moss seems to be enjoying these conditions a lot better as well! It grows better and looks more 'green'. There is also no longer a rag of algae in between the moss.

Here's a picture of my 'darkening method'


2012/03/16

Review Aquatic Nature Cocoon

While I'm currently battling a plague of algae, I suddenly realised I still need review the Aquatic Nature Cocoon nano tank. This particular review covers the Aquatic Nature Cocoon nr. 6, although I expect the other numbers of the cocoon series to be similarly equipped. 

The 'showcase' please note light & filter!
Please note that I found a way to order the 'tank only' of the Aquatic Nature Cocoon 6. Due to a bod choice I ended up with the (almost) full set articles that the set usually consist of. 

The specs of the full set:
  • Tank: 40x26x30 cm (31,2 litres)
  • Biological Hang On Filter 'Flow 200'. (I don't have this article)
  • Solar Duo Boy 26 watt; reviewed on this blog here
  • Glass plate for on top
  • Plastic edge pieces to fit the glass plate
  • Rubber matt to put the tank onto
The Tank:
The tank looks very solid and has nice rounded edges at the front. The back has regular 'sharp' 90 degree angles. The back glass is transparent out of the box. There is no foil that can be put on the back. A bit of a downside, although it at least give you options as an owner. I purchased it separately to create a black backside.
The empty tank, but with foil on the back
The Filter:
This is the piece that I don't own, so I hereby summarise some Dutch reviews on other sites.
A part on one of my favourite forums (http://forum.kreeftengarnalen.nl/viewtopic.php?f=25&t=6961) states that the filter is slightly noisy and has a relatively small biological filtering capacity. Other google results also note the noisyness...seems like a downside to me, but luckily I have my HMF which is silent and has plenty of capacity.

The Light:
Enough has been said here: it is brilliant!

The Glass Top:
This is where the pain starts with this tank! I had the setup in mind that Aquatic Nature advertises, with the light on the shortside. The glass top has a few downsides:
- It has no rounded edges. This means it does not slide up all the way to the front but sticks in the rounded edges in a strange way
- It is less deep than the tank, meaning there will be a 4-5cm wide gap at the back of the tank. This can be used for the filter normally, but it's too bad it goes across the whole width of the tank.
- It is just as wide as the tank (or slightly smaller). This means there is no space to accommodate the light on the short side, as demonstrated by Aquatic Nature. 

This was no viable solution for me at all! It is not aesthetically pleasing and it is impractical as shrimp can escape easily. 

I went to a local glass supplier and had a similar plate crafted for me. The expensive, but pretty solution. I had initially cut a plate of plexiglass that exactly fitted my setup. The plexiglass becomes week and bends though with humidity and warmth. The plexiglass was a nice pattern for the craftsmen.

The plastic edges:
Come in two cornered pieces and four straight pieces. Plenty of material to keep the plate steady. The material used is good, but the plastic could have been slightly more clear.

The rubber mat:
Does what it should do; no more no less. Is is coloured black, so fits most of the soil types. 

Conclusion:
All in all I am happy with the tank. It provides a good alternative to the typical nano tanks made by Dennerle and comes with good materials such as the Solar Duo Boy. The one big downside that Aquatic Nature should really work on is the glass plate on top, which doesn't fit at all. They should also be honest and show the tank in the way it can actually be setup. Mine is currently setup as showcased, but that needed glass cutting by a few craftsmen.

2012/03/02

Bad case of Algae

After getting back from a holiday I found my tank in a bad state :(

In a way that is no wonder, I had not cleaned or maintained it for 10 days. But still I was a bit disappointed in the amount of algae that covered the filter and mostly the valisneria (that are usually growing really well). The valisneria are particularly weak and 'slimey' at the tips. Some cary a whole load of algue (see the picture below). The algae have also spread across the other plants and seem to have a similar effect. Only the anubias seems to tolerate the algae a bit better. It also seems to be a combination of different sorts of algae.

I am a couple of weeks further down the road now. I have done regular water changes, have done regular cleaning of both windows and where possible plants and I have started to add a daily dosis of easycarbo. (10-20 drops per day on the 32 liter tank)

The big problem:  The algue are still here!!!

Who can help me solve this problem???

Please provide your suggestions below!! Your help is much appreciated!

Thanks in advance!
Whole load of algae on tip of baby valisneria

Algae on tips of Echinodorus
Algae on tip of (larger) valisneria leaf

Combination of algae on Anubias nana


2012/02/24

the HMF Outflow redone

Sometimes it takes a long period of time and just a splitsecond to think of an improvement over an existing design. The same happened to me with the HMF Filter and the outflow I was using. Time to share it with you!

Before:
As can be seen in my earlier posts, I had my outflow passing over the long side of the tank, passing over the short side as well via a 90 degree turn to end up opposite to the HMF filter. At the time I chose efficiency over aesthetics - that much is clear. 

The idea:
I noticed that there was an abundance of waterflow in the tank, which reduced the need for my 'efficient' solution. I also remembered the more traditional HMF setup, where the water simply gets dropped on the frontside of the filter through an airpump or pump. Have a look at this site to see what I mean: http://www.swisstropicals.com.

After:
I decided to take away the tubing that bridges the long side of the tank as well as the second 90 degree bend. I then twisted the upright tube with the first 90 degree angle attached to it by 90 degrees counterclockwise. I reattached the tubing for the short side that also holds the outflow. A week of testing proves that the design works just as good as the previous, while keeping all the tank's mechanics on one side. Which of course looks a lot better!

A picture of the new outflow is attached at the bottom of this post.

Note: I first thought of the abundance of waterflow that makes this redesign possible after I cleaned up my clogged up pump. An important tip: clean out the pump regularly or you will stop your waterflow!!

The outflow exiting the filter over the shortside.... easy does it :)

2012/02/18

Aquatic Nature Solar Duo Boy Review

After selling the Superfish Aqualed on eBay because of disappointing lighting intensity*, I quickly rushed into buying new lighting. 


I had done some internet-research on hang-over lights and the lights from Aquatic Nature seemed to be well-fit for the job. I was positively surprised by the price level of these lights and as I also found out, there was hardly a lower price to be found on the internet than what you pay in the typical brick-and-mortar petstore. And then the brick-and-mortar pet store gives you better service and warranty conditions over the online RMA procedures that -- even in the best circumstances -- are usually a headache.


Here is a quick review of my experience with the Aquatic Nature Solar Duo Boy


Conclusions:
I would recommend this piece of lighting to any nano-aquarium enthusiast in both the 13 and 26 watt version, depending on the size of the tank and the plants' needs for light! It is not the cheapest of solutions, but there are certainly much more expensive lights out there. This probably gets the prize for being best value for money. It is a decently built light, with plenty of options to vary color and light-color, without a hassle. 


The good:
  • Steady and intense lighting, much better than the LED
    • My plants clearly love it!
  • It comes with an adapter to fit it to a range of glass thicknesses
    • The fit is good, the light is really steady!
  • No external power adapter
  • Night-time lighting through 2 LEDs
  • It comes in multiple colors to choose from
    • I picked the silver one
  • There are multiple PL lights and color spectra that can be bought and fit into the lighting
    • I only used the default supplied light thus far
  • There is a 13 and a 26 watt version
    • I bought the 26 watt version, as that is more intense than the AquaLED 28
The bad:
  • Switching between daytime and night-time lighting is done manually. 
    • This gives little added value in night-time lighting as you will either have to manually switch every night and morning, or have it stuck on daytime lighting with a timer to use the convenience of automation. I chose the latter
  • It has a much higher power consumption over the Aqualed 28
  • It has no option for dimming the intensity. It is either ON or OFF.
Remarks:
There is the option to buy the Solar Vision. Do note that it is the exact same light, but with the option to change the color of the cover through LED lights that are embedded in the cover. I leave it to your own judgement if you see the added value in that feature. I certainly do not.


* See my other review for the Aqualed. It is not a bad light, but it doesn't fit the needs for this tank.


With limited knowledge of electronics, but with a brother that has good knowledge, we are both convinced we can easily change the electronics scheme of the light, such that daytime and night-time lights can run on separate timers. If I decide to void my warranty, I will let you know. Encouragements are welcome in the comments below :)


Buying advice: 
I had the luck of buying a 'tank only' version of the Aquatic Nature Cocoon series. It usually comes with a hang-on filter AND the Aquatic Nature Solar Duo Boy. That basically means you get the filter for free! So if you like the Cocoon series and you like the Aquatic Nature Solar Duo Boy, buy it in a set! I have missed out on a free filter by being stubborn.


Pictures:
As you can see in particularly the last set of pictures, a much larger part of the gravel is lit even at a daytime picture as compared to a nighttime picture of the Aqualed. 

After: Solar Duo Boy (in daytime!)
Before: AquaLED (in nighttime!)
After: Solar Duo Boy
Before: AquaLED


After: Solar Boy Duo
Before: AquaLED


2012/02/11

Superfish Aqualed 28 Review

One of the things that caught my attention soon after starting up the tank, was the lighting, so here comes a review!


I purchased the SuperFish Aqualed 28 in my setup, because LED lighting is starting to become good value for money. That is, you don't pay the world for energy efficient lighting anymore. I was actually surprised by the low price of the SuperFish Aqualed 28, when I found them at Veldhuis. Since I could hardly find decent review of this article on the internet, I hope to spread a helpful one for potential buyers. Here is a quick summary of my experiences. 


The good:

  • It is extremely energy-efficient: only 3 watts of power consumption!
  • It is decently built
  • It has is flexible boom for the light to hang over the tank
  • It has a built-in dimmer (!) that allows for continuous ('analogue') dimming


The bad:

  • It has a separate power transformer. The connection of which is slightly loose, so may fall out accidentally
  • The flexible boom didn't quite make it for my tank
  • Even when set to the brightest setting, doesn't light a 35liter tank well enough

To confirm the last bullet point, I have attached some images. Take special notice of the third picture, as it shows the lighting without direct exposure of the camera to the LEDs. Although I am still quite fond of the idea of LED lighting, the bad shape of my plants makes me conclude nothing else than that I needed to buy a new piece of lighting. A quick response at Veldhuis tells me that it should be enough for a 35 liter tank. I dare to argue that the fun ends at a 20liter aquarium. Even then you will only enjoy the light if the tank is high, not wide like a typical aquarium. 


So in short: the SuperFish Aqualed 28 is the perfect light for economically and environmentally conscious aquarium enthusiasts that want to use it for a nano tank up to 20 liters. Anything above asks for more serious lighting. 


Next up: a review of the newly purchased Aquatic Nature Solar Duo Boy!


Pictures: 
Daytime action of the Aqualed 28

Nighttime action of the Aqualed 28

Daytime action shot from above


2012/01/20


DIY Gravel Cleaner

The nano aquarium is up and running for a few weeks now. It was only running for a week until I realised I needed a gravel cleaner. Why? Because I need to take water out of the tank for a weekly refresh, I want to clean the gravel, but I don't want to suck it up with the hose!!!

I soon found out there are specialised articles on the market for these types of tanks, but also that they are well overpriced. I decided to use some of the leftovers to build a DIY Gravel Cleaner after the idea of JBL, found here. (Nice thing about it is that it is square so it can reach the corners of the tank easily)

Here are the steps I took:
  • Take some PVC, e.g. electrical pipe, some tubing of roughly the same diameter and make sure to have some tie-wraps and teflon-tape or plumbers-tape ready
  • Take a small (transparent) square container left over after the contents have run out. I used a soap-container in my example. I would not recommend to use something that stored any more serious chemicals
  • Clean out the container REALLY thoroughly as shrimps will die if you don't!!!
  • Cut out the bottom of the container with a stanley knife
  • Bend the PVC pipe in a 90 degree angle to form an L-shape, such that it feeds the hose away from the tank 
  • Insert the PVC pipe into the fill-cap of the container. If it doesn't fit, use the plumbers-tape to create a tight fit and secure it with a tie-wrap
  • Fit the hose over the other end of the PVC tube by heating it in hot water, lubricating it with some soap and stretching it over the PVC pipe. Cool it down in order to quickly shrink it and secure it with a tie-wrap
  • Do some cleaning again to make sure any leftovers of soap are gone!
Your end-result, with all freedom for own interpretations in sizes and shapes, may look something like this:


Usage:
Obviously, this tool is used to take water out of the tank, have enough suction power to take away dirt while keeping the gravel in the tank. Here is a quick how to:
  • Place a bucket on the floor near the tank
  • Put the gravel cleaner in the tank (make sure there are no curious shrimps in it)
  • Suck up some water from the other side of the hose (don't worry, you won't die of a little water and you will get better at it)
  • Now quickly put that end of the hose in the bucket when pressure builds up
  • If you have a large diameter hose, like I do, squeeze it to control the flow and keep the gravel inside the tank
  • To stop the flow, just pull the cleaner out of the aquarium
Tips:
  • I actually use the same hose, but in reverse, for filling the aquarium
  • The larger the difference in heights between the bucket and the tank, the higher the flow-rate
Have fun using this cheap solution to great aquarium cleaning!